
Are you dreaming of a bold new look, perhaps a chic pixie hairstyle that feels just right for you? It's a pretty big decision, you know, to go for something so striking. Many folks wonder if they can actually achieve that salon-perfect pixie at home, and the good news is, with a bit of patience and the right approach, it's absolutely possible to give yourself a fantastic short cut.
There's a certain freedom that comes with a shorter style, a feeling of lightness and confidence that can truly transform your whole vibe. Maybe you've been admiring pixies on others, or perhaps you're ready to shed some length for a more manageable, stylish everyday look. This guide is here to walk you through the steps, helping you feel prepared and ready to make that snip.
We'll talk about getting ready, what tools you'll want to have on hand, and how to approach the actual cutting process so you can get a beautiful result. It's almost like a careful personal project, where every step counts towards that amazing final look.
Table of Contents
- Why a Pixie Cut?
- Getting Ready for Your Pixie Cut
- The Cutting Process: Step by Step
- Troubleshooting and Tips for Your New Pixie
- Maintaining Your Pixie Hairstyle
- Styling Your Pixie
- Frequently Asked Questions About Cutting a Pixie
- Conclusion
Why a Pixie Cut?
A pixie cut is more than just a short hairstyle; it's a statement. It can really highlight your facial features, making your eyes pop and your jawline stand out. Many people find this style incredibly liberating, as it often means less time spent on daily styling. Plus, it can give your hair a whole new lease on life, removing damaged ends and allowing for fresh, healthy growth. It's a pretty bold move, but one that often pays off with a confident, chic appearance.
Think about the sheer variety, too. Pixies aren't just one look; they come in so many different forms, from super short and edgy to longer, softer versions with wispy fringes. This means there's almost certainly a pixie style out there that's just perfect for your unique face shape and personal vibe. It's about finding that balance between what you want and what will truly flatter you, which is a rather personal decision.
Getting Ready for Your Pixie Cut
Before you even think about picking up those scissors, getting ready is a really important step. This preparation phase is crucial for making sure your at-home cutting experience goes smoothly and yields the results you're hoping for. It’s a bit like gathering all the facts and opinions before making a big personal choice, so you feel totally prepared.
Tools You Will Need
Having the right tools on hand makes all the difference when you're cutting hair at home. You don't need a salon's worth of equipment, but a few key items will make the process much easier and the results much better. This is, you know, where your personal toolkit really shines.
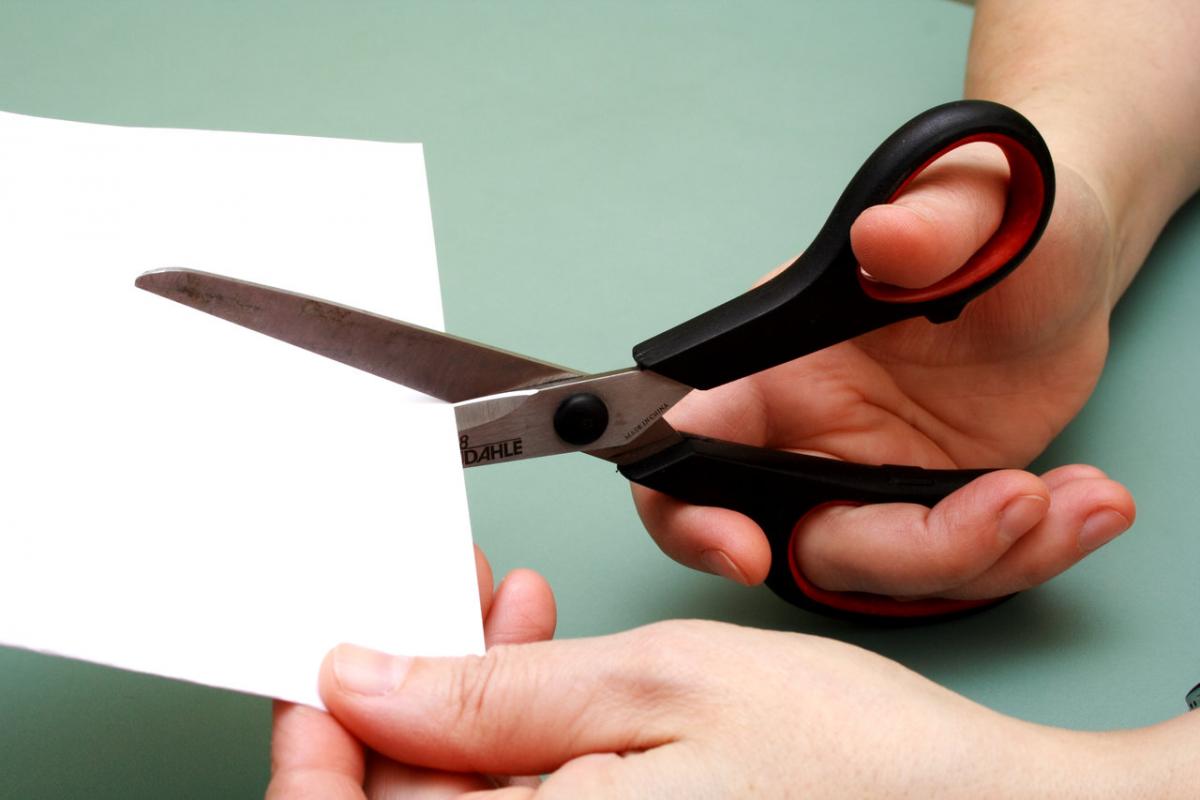
- Sharp Hair-Cutting Scissors: Please, please, do not use kitchen scissors or craft scissors! They are simply not sharp enough and can actually damage your hair, leading to split ends. Invest in a good pair of professional hair-cutting scissors. They make a clean cut, which is pretty vital for a neat pixie.
- Fine-Tooth Comb: A comb helps you section your hair precisely and ensures each strand is smooth before you cut it. This is rather important for getting straight lines.
- Hair Clips or Sectioning Clips: These are super helpful for holding sections of hair out of the way while you work on another part. They keep things organized, which is actually a big deal.
- Spray Bottle with Water: Keeping your hair damp as you cut helps with precision. Dry hair can be harder to work with and might spring up differently after it's cut.
- Two Mirrors (One Handheld, One Wall-Mounted): This setup is pretty much essential for seeing the back and sides of your head. You really need to see all angles to ensure an even cut.
- Towel or Cape: To keep hair off your clothes and the floor. It just makes cleanup so much easier, you know.
- Hair Dryer: For drying your hair to check the final shape. Hair often looks different wet than it does dry, so this is a crucial step for checking your work.
- Texturizing Shears (Optional but Recommended): These scissors have teeth on one or both blades and are used to remove bulk and create softness, especially around the edges of your pixie. They can make a significant impact on the final look.
Preparing Your Hair
Once your tools are ready, it's time to get your hair prepared for its transformation. This step is about setting the stage for a successful cut. You want your hair to be in the best possible condition for cutting, which really helps with precision.
- Wash and Condition: Start with freshly washed and conditioned hair. This ensures there's no product buildup or oil that could make your hair clump together or feel heavy.
- Towel Dry: Gently towel dry your hair until it's damp, not soaking wet. It should be moist enough to comb through easily but not dripping. This is actually a key point for controlling the hair as you cut.
- Comb Through: Use your fine-tooth comb to remove any tangles. Your hair should be completely smooth and free of knots. Any tangles can lead to uneven cuts, so this is pretty vital.
- Set Up Your Space: Make sure you have good lighting and your mirrors are positioned so you can see all angles of your head. A clean, organized space helps you focus, which is a rather good idea.
Finding Your Inspiration
Before you make that first snip, it's a good idea to have a clear picture of the pixie style you're aiming for. Look at photos of pixies you admire, paying attention to the length, layers, and fringe. This gives you a visual guide and helps you communicate your desired outcome to yourself. It's almost like a personal negotiation with your own vision.
Consider your face shape and hair texture. Some pixies look amazing on round faces, while others flatter oval or heart-shaped faces more. Understanding your own features and how different cuts will fall on your specific hair type is a pretty important piece of the puzzle. This understanding really impacts the final look and how happy you'll be with it in your daily life.
Maybe you want a super short, edgy look, or perhaps something softer with a bit more length on top. Having these opinions and visuals firmly in mind will guide your hands as you cut, helping you avoid mistakes and achieve a look you truly love.
The Cutting Process: Step by Step
Alright, this is where the magic happens! Taking your time and working in small sections is absolutely key here. Remember, you can always cut more hair off, but you can't put it back on. So, proceed with a little caution and a lot of patience. It can feel a little difficult at first, but you've got this.
Sectioning Your Hair
Proper sectioning is the foundation of any good haircut, especially a pixie. It allows you to work systematically and ensures an even result. This is, you know, a very important organizational step.
- Create a Horseshoe Section: Using your comb, draw a line from just behind one ear, over the top of your head, to just behind the other ear. Clip the hair above this line out of the way. This top section will be cut last.
- Divide the Back: The hair below the horseshoe section (at the back of your head) can be further divided into two or three horizontal sections, depending on the thickness of your hair. Clip the upper parts of this back section up and out of the way, leaving only the very bottom section exposed.
Starting the Back
The nape of your neck is usually where you'll start. This area sets the baseline for the rest of your cut. It's a good place to begin because it's often the shortest part of a pixie, and it's easier to gauge length here.
- Establish Your Guide: Take a small vertical section of hair from the very center of the lowest back section. Comb it straight down. Decide on your desired length for the nape. Hold the hair between your index and middle fingers, pulling it taut, and snip straight across, just below your fingers. This small piece is your guide for the rest of the back.
- Work Across the Back: Take the next small vertical section of hair right next to your guide. Include a small piece of your already cut guide hair in this new section. Comb it down, match the length to your guide, and snip. Continue this process, working your way across the entire bottom section of the back, always using a piece of the previously cut hair as your guide.
- Move Upwards: Once the first horizontal section is done, unclip the next horizontal section above it. Comb it down over the section you just cut. Now, use the hair from the section below as your guide, cutting the new section to match its length. Repeat this until the entire back of your head is cut. Remember to keep checking for balance as you go, ensuring a consistent length across the back.
Moving to the Sides
The sides of a pixie are pretty important for framing your face. You'll want to be careful here to ensure symmetry.
- Unclip Side Sections: Unclip the hair on one side of your head, leaving a small section near the ear exposed.
- Connect to the Back: Take a small vertical section of hair from the very back of the side section you just unclipped. This section should include a small piece of the hair you already cut at the back. This is your guide for the side.
- Cut the Side: Comb the hair down and cut it to match the length of your guide. You can cut straight across for a blunt look or angle your scissors slightly for a softer, graduated effect. Work your way forward towards the front of your ear, always using a small piece of the previously cut hair as your guide.
- Repeat on the Other Side: Once one side is done, repeat the entire process on the other side, being extra careful to match the length and shape. This is where those two mirrors really come in handy for checking symmetry. It's a bit of a negotiation to get them just right.
The Top and Fringe
The top section and fringe (bangs) are where you can really customize your pixie. This is where you decide on the volume, texture, and overall style. The decision here impacts the entire look.
- Unclip the Top Section: Release the horseshoe section of hair you clipped away earlier.
- Determine Length and Layers: For the top, you'll generally want it longer than the back and sides, allowing for more styling versatility. You can create layers by pulling sections of hair straight up from your head and cutting them. The shorter you cut these elevated sections, the more layers you'll have and the more volume you'll create.
- Create a Guide for the Top: Take a small section of hair from the very top center of your head, pulling it straight up. Decide on your desired length for the longest layers. Snip straight across. This is your guide for the rest of the top.
- Work Across the Top: Take small sections, pulling them up to meet your guide, and cut. Work from the center outwards.
- Address the Fringe/Bangs: Comb the hair that will form your fringe straight down over your forehead. Decide on the length. You can cut straight across for blunt bangs, or hold your scissors vertically and make small snips (point cutting) for a softer, more feathered look. Remember to cut the fringe slightly longer than you want it, as it will spring up when dry. This is where a little bit of caution goes a long way.
- Blend the Sides of the Fringe:

Detail Author:
- Name : Emelie Hirthe
- Username : michale47
- Email : pascale.abernathy@hotmail.com
- Birthdate : 1992-09-10
- Address : 94060 Rath Stravenue Apt. 286 Fredrickberg, PA 17832
- Phone : +1-813-743-2110
- Company : Considine Group
- Job : Urban Planner
- Bio : Fuga inventore labore reiciendis consequatur nihil laudantium in. Enim est ut est neque qui aspernatur.
Socials
twitter:
- url : https://twitter.com/kari_herzog
- username : kari_herzog
- bio : Quo ipsam libero eaque consequatur qui aut vel. Quam in omnis numquam cumque. Dolor doloribus repudiandae est odit.
- followers : 5093
- following : 1201
facebook:
- url : https://facebook.com/kari_herzog
- username : kari_herzog
- bio : Magnam magnam quis qui non eum.
- followers : 3248
- following : 1288
linkedin:
- url : https://linkedin.com/in/kari_xx
- username : kari_xx
- bio : Magnam illum veniam quis omnis.
- followers : 6544
- following : 1954
