
Have you ever thought about how a tiny stitched detail can truly bring a project to life? Perhaps you enjoy the quiet joy of creating something with your own hands, or maybe you are just looking for that one special element to make a piece truly unique. Well, an embroidered bee, with its charming shape and gentle presence, offers just that kind of delightful touch to so many different hand stitching adventures. It's a motif that, in a way, speaks of nature's simple beauty and the warmth of a sunny day, making it a very popular choice for crafters of all skill levels.
Adding these small, buzzing creatures to your fabric can transform an ordinary item into something quite special, something that tells a little story. Think about how a few well-placed stitches can make a piece of cloth feel more alive, more connected to the world around us. It's a bit like adding a secret garden to your work, and the embroidered bee is, you know, one of its most delightful inhabitants.
This article will guide you through the wonderful world of stitching these delightful insects, from picking your materials to placing them on your favorite items. We will look at why these tiny creatures are so loved in the stitching community, and give you some good ideas for making them part of your next creative project. So, get ready to bring a little bit of nature's charm to your handiwork.
Table of Contents
- Why the Embroidered Bee is Such a Beloved Motif
- Getting Started: Your First Embroidered Bee
- Beyond the Basics: Creative Ways to Use Your Embroidered Bees
- Tips for a Polished Embroidered Bee
- Frequently Asked Questions About Embroidered Bees
- Your Next Stitching Adventure with the Embroidered Bee
Why the Embroidered Bee is Such a Beloved Motif
The embroidered bee has, you know, truly captured the hearts of many who enjoy working with needle and thread. It’s not just a pretty shape; it carries a lot of good feelings and ideas with it. People seem to connect with these little creatures for many reasons, making them a consistently favored design in hand stitching. This popularity, it seems, just keeps growing.
A Symbol of Nature's Busy Charm
A bee, in a way, brings to mind hard work, community, and the beauty of a garden in full bloom. When you stitch an embroidered bee, you are capturing a piece of that natural energy. It reminds us of sunny days and the important role these insects play in our world. That feeling of connection to nature is, like, a big part of why people are drawn to this particular design.
They represent, too, the sweetness of life and the idea of working together. For many, a stitched bee is a small reminder of these good things. It’s a very simple image, yet it holds so much meaning, which is why it often appears in thoughtful gifts and personal projects. The charm of it is quite undeniable, really.
Versatility in Your Stitching Projects
One of the best things about the embroidered bee is how well it fits into so many different kinds of projects. Whether you are adding a tiny detail to a piece of clothing or making a larger scene, a bee can find its place. It works well on its own or as part of a bigger picture, perhaps with flowers and leaves, as you might find in some of our older tutorials from October 3, 2013, about stitching those natural elements.
This little creature is, you know, pretty adaptable. You can make it look realistic or more like a cartoon, depending on the feel you want for your project. It can be a main focus or a subtle accent, which gives you a lot of freedom in your creative choices. This flexibility is, honestly, a big reason why it’s so loved by people who enjoy stitching.
Getting Started: Your First Embroidered Bee
If you are new to stitching an embroidered bee, don't worry, it's a lot simpler than you might think. Getting started is mostly about having a few basic items and a little bit of patience. We'll walk through the simple steps to help you create your very first buzzing friend, which is, you know, a pretty good place to begin.
Gathering Your Simple Supplies
To begin your embroidered bee, you will need just a few common things. First, some fabric is good, perhaps a piece of cotton or linen. Then, you will want embroidery floss in colors like black, yellow, and maybe a little white or light blue for the wings. A needle with an eye big enough for your floss, and a small embroidery hoop to hold your fabric taut are also pretty important. Scissors, too, are always handy for cutting threads.
Having these simple items ready makes the whole process smoother. You don't need anything fancy to start; just the basics will do. It’s about getting comfortable with the tools, and that, you know, makes a big difference in how much you enjoy the stitching itself.
Sketching Your Little Friend
Before you pick up your needle, it's a good idea to lightly draw your bee onto your fabric. This helps you get the shape and size just right. You can use a water-soluble pen or a light pencil for this. Just a simple oval for the body, a smaller circle for the head, and two little wing shapes are, you know, usually enough to get you going. This is similar to how you might draw the position of a mounting board on the back of an embroidered piece to keep things straight, as mentioned in some of our older discussions about preparing your work.
Drawing a guide is especially helpful when you are stitching "off the grid," meaning without a printed pattern, as we have talked about when trying to stitch geometric shapes like a star without them looking, you know, a bit uneven. A light sketch helps make sure your embroidered bee turns out just as you imagined. It really does make a big difference, honestly.
Basic Stitches for a Buzzing Design
For a simple embroidered bee, you will mostly use just a few basic stitches. The satin stitch is great for filling in the body with solid color, giving it a smooth, full look. For the stripes, you can use a backstitch or a simple straight stitch. The wings can be done with a very light satin stitch or even a few long straight stitches to give them a delicate, airy feel. French knots or tiny straight stitches work well for the eyes.
These stitches are, you know, pretty easy to learn if you don't know them already. There are lots of resources for hand embroidery that offer tips and tricks for these common stitches. Practicing them a little bit before you start your bee can make you feel more confident, and that, you know, really helps with the finished look.
Beyond the Basics: Creative Ways to Use Your Embroidered Bees
Once you get comfortable stitching an embroidered bee, you will find so many fun ways to use them. These little designs are incredibly versatile, fitting into a wide range of projects. It's a bit like adding a signature touch to things you already love, or even giving new life to items that need a little pick-me-up. There are, you know, truly endless possibilities.
Enhancing Garments and Accessories
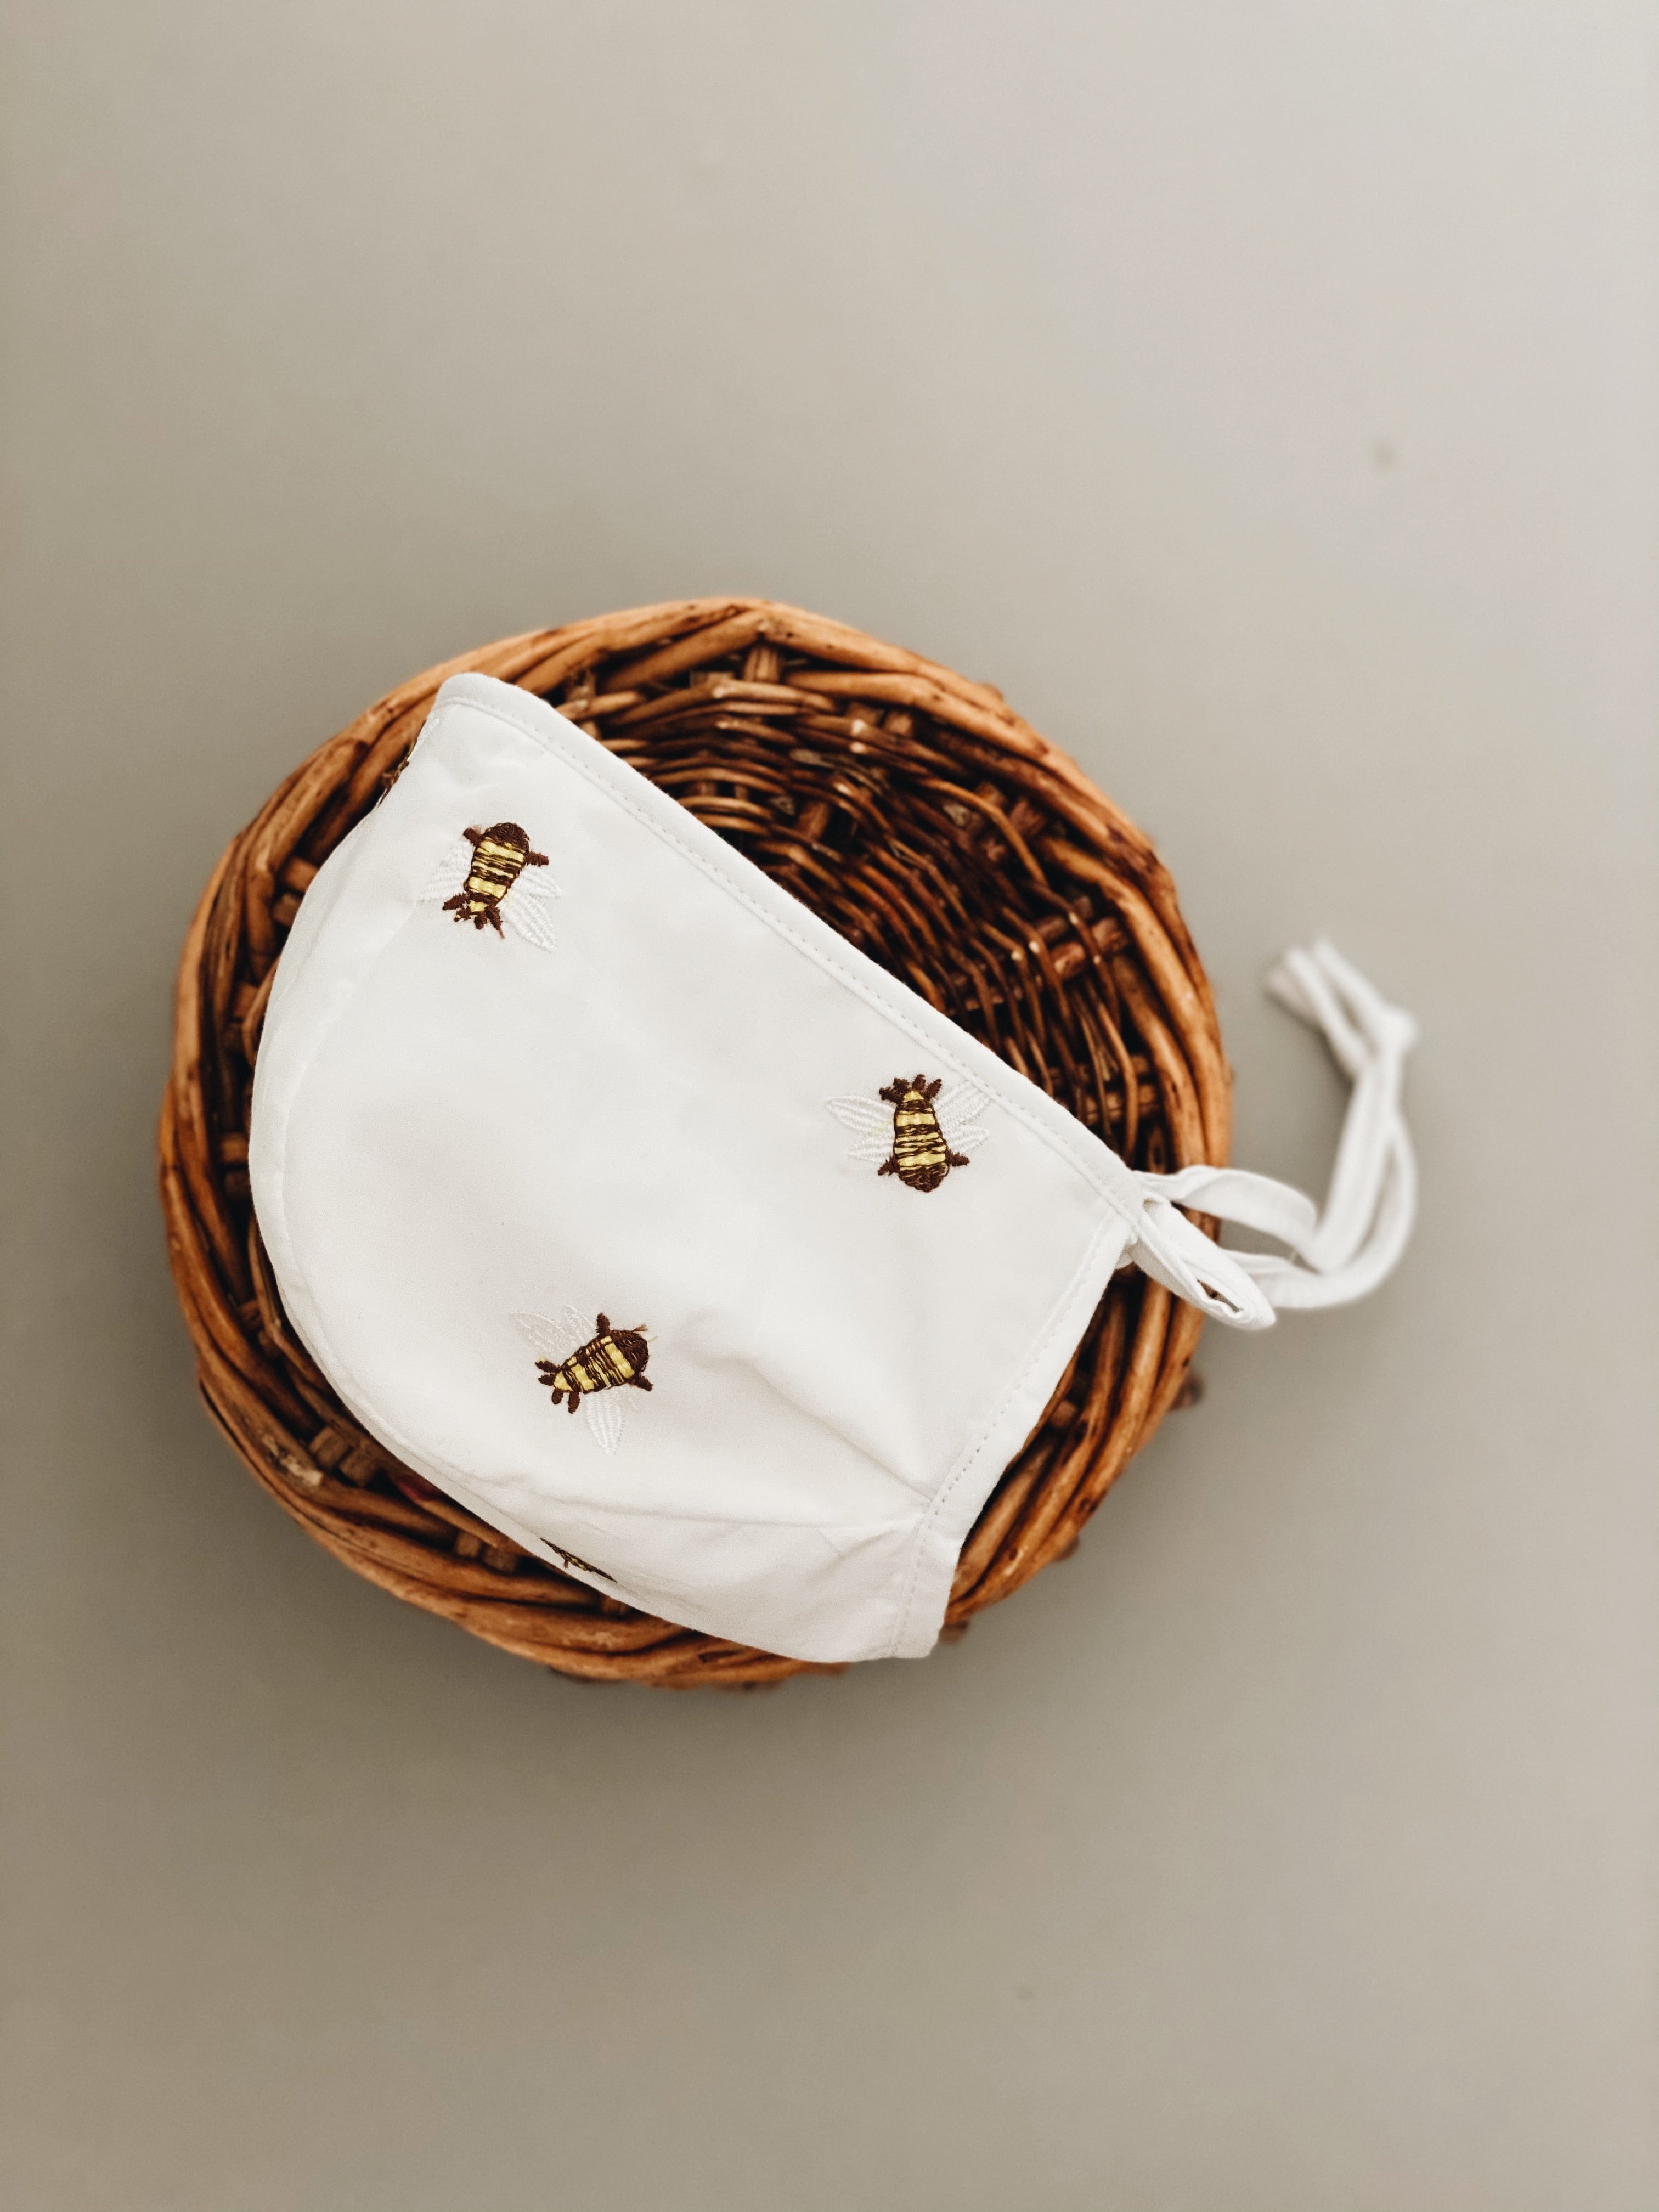
An embroidered bee can add a sweet, personal touch to your clothes or accessories. Imagine a small bee on the collar of a shirt, the pocket of a denim jacket, or even on a simple canvas bag. It's a subtle way to show your love for nature and add a handmade detail to your everyday items. This can make something mass-produced feel, you know, truly special and unique to you.
You could also place a few bees around the brim of a sun hat or on a simple fabric headband. They are small enough not to be overwhelming but big enough to be noticed and appreciated. This kind of personal touch really makes an item feel more like "you," and that, you know, is a pretty good feeling.
Breathing New Life into Old Pieces
Do you have some old, perhaps vintage, embroidered linens that are a bit worn out, but still have pretty bits of stitching on them? You know, there are lots of things you can do with those usable parts. An embroidered bee can be a perfect addition to mend a small tear or cover a stain, giving the piece a fresh look while honoring its past. It's a lovely way to keep cherished items in use.
This is a great way to practice what we call "stitch play," where you experiment with adding new elements to existing work. You can, you know, strategically place a bee to draw the eye away from a flaw, or simply add it as a charming new detail to an already lovely piece. It’s a bit like giving something a second chance at beauty.
Bees on Paper: Cards and Small Gifts
If you like embroidery and also enjoy making your own greeting cards, or even if you have never combined embroidery and paper crafts, you are in for a treat. An embroidered bee can make a truly memorable greeting card. You can stitch the bee directly onto sturdy cardstock or a small piece of fabric that you then attach to the card. This adds a wonderful texture and a handmade feel that printed cards just can't match.
Think about using them on small paper mini caskets or paper boxes, like the PDF pattern for a wee three-dimensional paper casket we have talked about before. These small stitched details can turn a simple paper item into a tiny treasure. It's a very thoughtful way to personalize gifts, and that, you know, makes them extra special for the person receiving them.
Combining Bees with Other Natural Elements
Bees are, you know, natural partners for other stitched elements from the natural world. Think about pairing your embroidered bee with leaves and flowers, like those we covered in our tutorials from October 3, 2013. You can create a whole little garden scene on your fabric. Whether it's tree branches, wispy herbal shoots, curly vines and tendrils, or heavy blossoms, a bee will fit right in.
You could have a bee hovering near a stitched flower, or perhaps flying along a winding vine. This adds depth and a sense of movement to your design. Combining elements makes your piece more interesting and gives you more ways to express your creativity. It’s a bit like telling a little story with your needle and thread, and that, you know, is pretty neat.
Tips for a Polished Embroidered Bee
Making your embroidered bee look its best involves a few simple tricks. These tips can help you achieve a clean, professional finish, even if you are just starting out. It’s about paying a little attention to the small things, and that, you know, often makes a big difference in the final result.
Keeping Your Stitches Neat
To make your embroidered bee look tidy, try to keep your stitches even in length and tension. This means pulling your thread through the fabric with the same amount of pressure each time. If your stitches are too loose, they might look messy; too tight, and they could pucker the fabric. A consistent tension is, you know, pretty important for a smooth look.
Also, try to keep your threads from tangling on the back of your work. This helps your piece lay flat and look clean from all sides. Taking your time and being mindful of each stitch will, honestly, lead to a much nicer finish. It’s a bit like being careful with each brushstroke when painting.
Playing with Color and Texture
Don't be afraid to experiment with different colors and types of thread for your embroidered bee. While black and yellow are classic, you could use shades of brown, gold, or even metallic threads for a bit of sparkle. For the wings, a sheer, almost transparent thread can give a very delicate effect. This kind of experimentation is, you know, part of the fun of stitch play.
You could also use different numbers of thread strands to create varying textures. More strands will give a bolder, thicker look, while fewer strands will result in a finer, more subtle line. This allows you to add depth and interest to your bee, making it truly unique. It’s a bit like adding different spices to a dish; they change the whole flavor, you know.
Making Bees Part of a Larger Scene
While a single embroidered bee is lovely, placing several bees together or combining them with other elements can create a more dynamic scene. Think about a bee flying towards a cluster of stitched flowers, or a few bees buzzing around a central point. This creates a sense of story and movement in your piece.
You can use the principles of composition to guide where you place your bees. Think about how your eye will travel across the design. Adding other natural elements, like the leaves and flowers we have tutorials for, can really enhance the overall picture. It’s a bit like arranging items in a picture to make them look just right, and that, you know, makes the whole thing much more engaging.
Frequently Asked Questions About Embroidered Bees
People often have questions when they start stitching these charming little creatures. Here are some common things people wonder about when creating an embroidered bee.
How do you embroider a simple bee?
To stitch a simple bee, you can start by drawing an oval for the body and a small circle for the head on your fabric. Use satin stitch to fill in the body with yellow and black stripes. The head can be black with tiny French knots for eyes. For the wings, use a few straight stitches with white or light blue thread. It’s a very straightforward process, honestly, once you get the hang of it.
What stitches are best for bee embroidery?
The most common stitches for an embroidered bee are satin stitch for filling in the body, backstitch or straight stitch for the stripes, and straight stitch or a light satin stitch for the wings. French knots are also good for tiny eyes. These stitches are pretty versatile and allow for a good range of looks, you know, from simple to more detailed.
Can I put an embroidered bee on clothing?
Yes, you can absolutely put an embroidered bee on clothing! They look charming on shirt collars, pockets, denim jackets, or even on hats and bags. Just make sure to use a stabilizer on the back of your fabric to keep your stitches neat and prevent puckering, especially if the fabric is stretchy. This helps the design last longer, and that, you know, is pretty important for wearable art.
Your Next Stitching Adventure with the Embroidered Bee
The embroidered bee is, you know, a truly delightful motif that offers endless creative possibilities for anyone who enjoys hand stitching. From adding a sweet detail to a garment to breathing new life into a cherished vintage linen, or even making a unique greeting card, these little buzzing friends can bring so much joy to your projects. Their simple shape and rich symbolism make them a favorite for many, and it's easy to see why they are so loved.
We hope these ideas and tips inspire you to pick up your needle and thread and start stitching your own charming bees. Remember, every stitch you make adds to your skill and your unique artistic voice. Why not try adding an embroidered bee to your next creation? You can learn more about hand embroidery techniques on our site, and perhaps find more inspiration for your next project by visiting our gallery of nature-inspired designs. Happy stitching!


Detail Author:
- Name : Dr. Haylee Price
- Username : christiana99
- Email : kari45@gmail.com
- Birthdate : 1977-05-16
- Address : 66753 Roberts Inlet Apt. 989 East Vincenza, MS 10876-2204
- Phone : 475-314-0346
- Company : Crona Ltd
- Job : Photographic Developer
- Bio : Id in occaecati soluta eaque quasi ex. Voluptatem omnis aut doloribus odio non exercitationem facilis sint. Est dolore aut quibusdam exercitationem inventore error tempore.
Socials
facebook:
- url : https://facebook.com/jakeroberts
- username : jakeroberts
- bio : Dolorem quaerat quia ut voluptatem expedita soluta aut.
- followers : 4745
- following : 2905
linkedin:
- url : https://linkedin.com/in/jake_roberts
- username : jake_roberts
- bio : Est sint quo aut.
- followers : 4568
- following : 1134
